Published on 26th July, 2023 by Cable Chick

Bridging the Gap - Connecting your turntable to modern AV devices


Bridging the Gap - Connecting your turntable to modern AV devices

Have you been wondering how you can marry your old AV gadgets with your new modern devices but don't know where to start? In our new series 'Bridging the Gap', we'll dive into this topic starting with the classic turntable.
In today's rapidly advancing technological landscape, we often find ourselves caught between the desire to embrace modern technology and the nostalgia associated with our beloved older electronics. One such example is the challenge of connecting our vintage turntable to contemporary playback devices such as sound bars and AV receivers.


The good news is that with a little know-how and the right accessories, you can bridge the gap between old and new and enjoy the best of both worlds. In this article, we will explore various methods for connecting your beloved turntable to your fancy new playback devices and allow you to finally blow the dust off your hard-earned record collection and dive back in.


Understanding the Basics

Turntable components

Before getting into the specifics, it's important to grasp a few essential concepts. Turntables produce analog audio signals, which are characterised by vibrations from physical grooves on vinyl records. The turntable consists of 4 major components, the platter, the tonearm, the cartridge and the stylus. As the platter spins, the stylus is guided by the tonearm to follow the grooves of the record, picking up the tiny vibrations within them. The movement of the stylus creates small changes in the magnetic field within the cartridge which are converted into an electrical signal by the coils within the cartridge and voila! We have sound the old-school way!

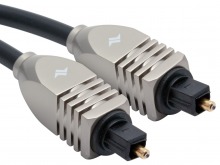
On the other hand, modern audio systems process digital audio signals, often transmitted via HDMI or TOSLINK optical connections with minimal to zero moving parts. The challenge lies in converting the analog signal from the turntable into a digital format compatible with your digital playback devices such as soundbars and AV receivers. But don't worry, that's why we're here!


Method 1: Phono Preamp and RCA Connection

A2D Conversion

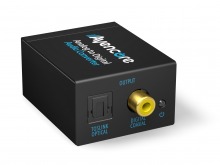
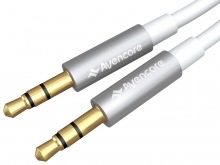
The most common approach for connecting a turntable to modern components is by using a phono preamp and RCA cables. A phono preamp, also known as a phono stage or phono amplifier, is a device that amplifies and equalises the low-level signal being output by the turntable. Here's a step-by-step guide:

  1. Locate the phono output on your turntable. It is usually labelled as 'Phono' or 'output'. Some modern turntables have a built in preamp so it may be worth checking the user manual and if so, you can skip to step 3.
  2. Connect high quality RCA cables from the turntable's RCA (red & white) outputs to the inputs of the phono preamp. We recommend Avencore's 2RCA Crystal Series Audio Cables for connection both to and from the phono preamp and to keep them as short as possible.
  3. Ensure the phono preamp is powered (if required) and then connect another pair of quality RCA cables from the outputs of the preamp into an Analog to Digital Audio Converter. This will allow you to convert your turntable's analog audio signal into a digital format for connection to your playback device. The converter required will depend on the available inputs on your soundbar or AV receiver.
  4. For devices with digital optical inputs: You will need one of our Avencore Analog to Digital Audio Converters along with an Avencore Digital Optical Toslink Cable of the desired length and connect it to the optical input on your playback device.
    For devices with HDMI inputs: You will need one of our Avencore Composite Video to HDMI Converters along with a HDMI cable of the desired length and connect it to the HDMI input on your playback device. Obviously you won't have any video signal, but it works for audio just the same.


Method 2: USB Turntables

USB-C to HDMI

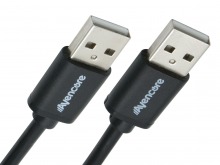
If you own a USB turntable, connecting it to a modern playback device becomes significantly easier if your device also has a USB port available. USB turntables have a built-in analog-to-digital converter, allowing them to connect directly to computers or modern audio systems. If you are connecting to an available USB port on your playback device, simply connect the provided USB Cable, select the appropriate input source and away you go! If you are connecting to your computer, there are a few more steps involved. Here's how to proceed:

  1. Connect the USB turntable to your computer or laptop using the provided USB cable. If you need a replacement we have a wide range of replacement USB Cable options available to suit.
  2. Make sure your computer recognises the USB turntable as an audio input device. Adjust the input settings in your computer's audio preferences if necessary.
  3. Connect your playback device to your computer using a HDMI, optical, or 3.5mm audio cable, depending on the available ports.
  4. Set the playback device to the appropriate input source, and you should now be able to hear your record!


Method 3: Bluetooth Transmitters and Receivers

turntable via wirelss transmitters

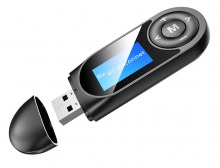
Some modern turntables have Bluetooth functionality, so provided your sound bar or AV receiver also has this feature, all you need to do is pair the two of them together and you're good to go! Another option is through the use of Bluetooth transmitters and receivers which are small wireless devices placed on both the turntable and playback device ends (if needed) and allow you to stream your music between the two without those pesky cables getting in the way. Here's how it works:

  1. Connect a Bluetooth transmitter to the turntable's audio output. This can usually be achieved using RCA or 3.5mm audio cables.
  2. If your playback device has Bluetooth functionality: you will simply need to follow the Bluetooth transmitter's instruction manual to pair the two devices together.
  3. If your playback device does not have Bluetooth functionality: you will need a Bluetooth receiver unit in addition to the transmitter.
  4. Pair the Bluetooth transmitter with a Bluetooth receiver connected to your playback device. Follow the instructions provided with the devices to establish the connection.
  5. Set the playback device to the appropriate input source, and you can wirelessly stream the audio from your turntable to the soundbar or receiver.


In Conclusion

The journey to connect older electronic devices, like turntables, to modern playback devices may seem daunting at first, but with the right knowledge and tools, it can be a rewarding experience. Whether you choose to use a phono preamp, USB turntable, or Bluetooth transmitters and receivers, the goal remains the same - to seamlessly integrate your vintage vinyl collection into a modern audio setup.

By following the steps outlined in this article, you'll be well on your way to enjoying the warm analog sound of your turntable through the dynamic soundstage of a contemporary playback device. Happy listening!


Questions?

If you have any questions or need help with your own turntable set up, don't hesitate to contact us, we're always happy to help.


Back to Top